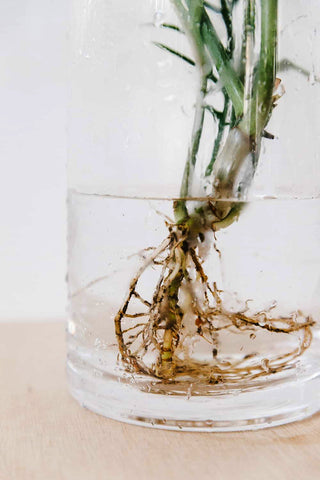
Let's discuss the process of transitioning from soil to Semi-Hydroponics. Whether you're using our Semi-Hydro blend, Clay Pebbles, or any other hydro substrate, we want to provide you with some guidance on converting your soil-grown plants to semi-hydro.
The first step is to select one of your beloved plants for this process. Once you've chosen the plant, it's time to remove it from the nursery pot and get rid of the loose soil.

The next part is crucial! You need to remove as much soil as possible from the roots by washing them with lukewarm water. Washing the roots can be challenging, especially if the substrate is peat-based and clings stubbornly even with gentle rubbing in the shower.

Here are some tips and tricks to make the soil removal easier:
- Soak the roots in slightly warm water for an hour or two to loosen the soil.
- Use a soft-bristled brush to gently dislodge the soil by applying pressure to the affected areas.
- Slowly and carefully run the roots between your fingers under the shower, gently massaging off the excess soil.
It's normal to break or detach finer, secondary roots when removing soil from roots. In semi-hydroponics, these secondary roots are usually replaced with new ones soon after establishing.

If you notice root rot when removing the plant from soil, we highly recommend treating it with a solution of hydrogen peroxide (5% hydrogen peroxide to 95% water) for 5-10 minutes. This will help eliminate any harmful pathogens and stop the spread of rot. If all the roots have completely rotted away, simply remove any remaining roots and propagate the plant until you're ready to transition it to semi-hydroponics later.
Now that you have clean roots (hopefully), it's time to pot your plant in a beautiful self-watering planter using our Semi-Hydro mix. Before adding the mix, we suggest soaking it in a bowl or flooding the bag with a hole at the bottom to remove any dust or sediment accumulated during transit and storage. This ensures that the porous materials in the mix can function effectively when added to the pot.
Once you have a clear solution after rinsing and soaking the mix, fill your insert pot about one-third of the way with the clean Semi-Hydro mix. Then, position your plant, ensuring that its roots fit in the pot and the stem is centred. Backfill with the semi-hydro mix around the plant, gently shaking the pot to allow the aggregate to reach the delicate root gaps without applying pressure to the roots.
After potting up, you can add our Slow Release Fertiliser if you choose to use it. We recommend not exceeding 2% of the pot's substrate volume and using less of this potent fertiliser is often better. We will soon provide a helpful chart with recommended fertiliser doses based on specific plants.
You can sprinkle the fertiliser into different layers of the mix or around the top. Either way, the nutrients will be slowly absorbed and delivered to the hungry roots.
If you opt for liquid fertiliser, we suggest waiting about a month before fertilising to allow the plant to establish new root growth. We always recommend using Liquid Gold Leaf as a complete liquid fertiliser.
Finally, water the plant thoroughly, ensure your reservoir is full, place your newly converted plant in a well-lit area, and enjoy a simpler approach to indoor growing! For more information on our Semi-Hydro blend, refer to our Complete Guide.
We Recommend:


